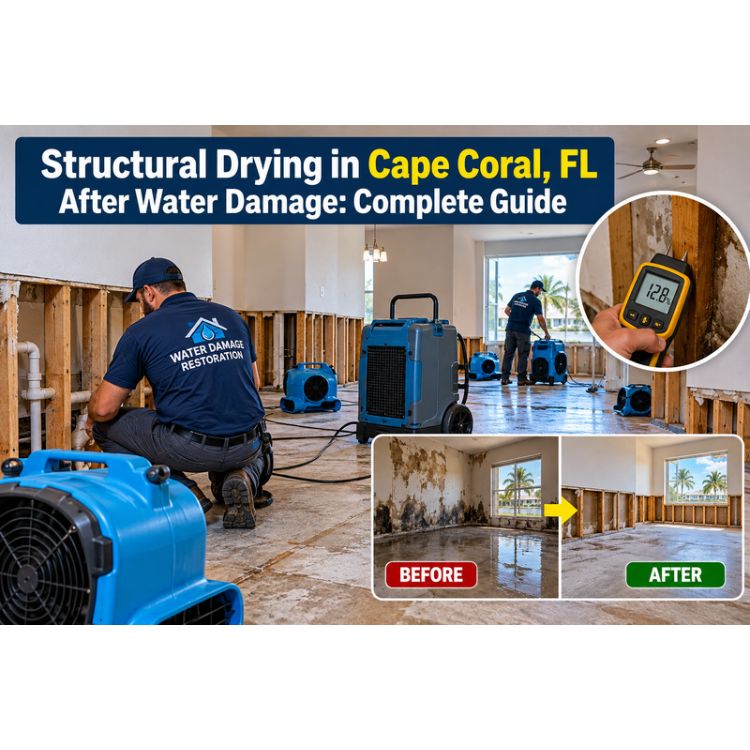
Structural drying removes moisture from the walls, floors, ceilings, and framing of a water-damaged home using controlled air movement, dehumidification, and documented moisture readings. The goal isn't for surfaces to feel dry. Materials should reach a drying target based on unaffected areas of your own home. Simple jobs usually take 3 to 5 days, while larger losses, hardwood flooring, hidden moisture, and contaminated water can take longer.
If the water damage just happened: stop the source if it's safe, shut off power to wet areas, and photograph everything before you move it. Call a professional today if any of these apply: the water has sat for more than a day, it reached the walls or flooring layers, it covers more than one room, or it came from sewage or storm surge. Don't run fans until you know the water was clean, and don't count on a fan alone to dry the inside of a wall. In most cases mold won't grow if wet materials are dried within 24 to 48 hours, so the first two days matter most.
Pumping out standing water fixes the part you can see. The water inside drywall, insulation, and subfloor causes the mold, warping, and surprise repair bills that show up months later.
This guide explains how professional drying works after water damage, what moisture readings mean, what to do in the first hours, and where DIY drying falls short. It also covers what to ask a structural drying Cape Coral company before you hire one, plus local issues in Cape Coral: humidity, flood damage, insurance deadlines, and permits.
What structural drying is, and what it isn't
After extraction, building materials still hold water. Structural drying speeds up evaporation, then captures the vapor with dehumidifiers so it can't soak back in.
Opening windows and running a box fan is a different thing. It depends on outside air, and in Southwest Florida that air is often as damp as the room you're trying to dry. A proper job closes the space, controls the air inside, and checks results with instruments.
One limit to know now: the industry guideline behind all this, the IICRC S500, is a voluntary consensus standard, not a mandatory one. Good contractors follow it. Nothing forces them to, which is why your questions matter
Where structural drying fits in water damage restoration
Restoration is a sequence, and drying sits in the middle of it:
water damage → assessment → extraction → moisture detection → air movement → dehumidification → moisture monitoring → drying verification → repair
The first seven steps are mitigation. The last is reconstruction: new drywall, insulation, flooring, and paint. Some companies do both and some only dry. Either way, ask for the drying scope in writing, separate from the rebuild estimate.
When is professional structural drying necessary?
Call a professional if:
Water has been there more than a day
The source was sewage, storm surge, or canal or floodwater
Water reached walls, insulation, or flooring layers
More than one room is affected
You smell mustiness or see early mold
You'll file an insurance claim and need documented drying
A small, clean spill on a hard floor that you wipe up within hours is usually fine to handle yourself.
Emergency structural drying: why the first 48 hours matter
Time is the main variable. The EPA's guidance is that in most cases mold won't grow if wet materials are dried within 24 to 48 hours. That's a guideline, not a guarantee. Mold may have started even when drying finished inside 48 hours, and it doesn't always grow after 48
Cape Coral adds a second clock. The city says flooding here comes from heavy rain and storm surge, and surge water is Category 3.
While you wait for the crew
Stop the water source if it's safe to reach.
Shut off power to wet areas if water is near outlets or appliances. Don't step into standing water to reach a panel.
Photograph and video everything before you move it.
Lift small items, rugs, and furniture off wet floors.
Skip the household vacuum. A wet vacuum can spread mold spores once material is no longer wet, and it won't dry carpet on its own.
Hold off on fans until you know the water was clean. EPA guidance says not to use fans before you've determined the water is clean.
Stay out of water you suspect is contaminated.
The two labels that shape every job: category and class
Before equipment goes down, the technician assigns two separate labels.
Category describes contamination.
Category | Meaning | Example |
|---|---|---|
1 | Clean source | Broken supply line |
2 | Significant contamination | Washing machine or dishwasher discharge |
3 | Grossly contaminated | Sewage, rising water, storm surge |
Category can worsen. Time and temperature increase Category 2 contamination, and Category 2 water left in a structure may be reclassified as Category 3. Many websites quote a 48-hour cutoff for Category 1 and a 72-hour cutoff for Category 2. The university and trade summaries of the standard I found tie the change to time and temperature instead of a fixed clock. Treat the hours as a rule of thumb, and treat any delay in Florida heat as a risk.
Class describes how much water the materials can give off. Class 1 involves the least water and evaporation, and Class 3 the most. Class 4 covers deeply held, bound water in low-porosity materials like plaster, hardwood, concrete, and masonry, and those assemblies may need special methods and longer drying times.
Class drives your equipment count and timeline. A tiled slab and a carpeted room with a soaked pad can both be "one room," yet they dry very differently.
How professionals dry a house after water damage, step by step
1. Stop the source and extract the water
Plumbing gets shut off, then pumps and extractors pull out standing and absorbed water. Mechanical extraction removes water faster than evaporation can, which is why it comes first.
2. Find where the water went
Water wicks up drywall, runs under baseboards, and pools in subfloor seams. The hidden-moisture section below covers the tools and their limits.
3. Remove what can't be saved
In common trade practice, soaked insulation and carpet pad come out, and so does drywall touched by Category 2 or 3 water. Techs may also pull baseboards or cut small openings so air reaches a wall cavity. The dry-in-place section below covers that decision.
4. Build the drying chamber
Techs close off the affected area. Air movers push air across wet surfaces, which speeds evaporation. LGR (low grain refrigerant) dehumidifiers then pull the vapor out of the air. LGR units are designed to bring grains per pound down to very low levels, which matters in a humid climate. Equipment placement is typically calculated from the water class and the volume of the space. Ask your tech how they sized the setup.
5. Monitor daily and adjust
Techs return to record moisture readings, temperature, and indoor humidity. If readings don't show adequate drying, the S500 calls for changing procedures, moving equipment, or adding more. Wet spots shift as materials release water, so a day-one setup often needs a day-two change.
The science behind this is psychrometrics, the study of how air and moisture relate. Relative humidity is a ratio that changes with temperature, so it can mislead on its own. Professionals also track grains per pound (GPP), the actual weight of vapor in the air. A patent filing on drying systems notes that lower relative humidity doesn't always dry faster, since RH isn't directly tied to how much water vapor the air holds. That source has a commercial angle, but the idea is standard in the trade. Ask your tech which measurements they log each day.
6. Verify against a drying goal
This step separates a real dry-out from "we ran fans for three days."
The S500 uses two terms. The dry standard is a reasonable estimate of a material's moisture level before the water intrusion. The drying goal is the target the restorer sets for the end of drying. The dry standard comes from readings on known-dry materials in an unaffected part of the building. Your own dry drywall sets the target for your wet drywall.
Some pages quote universal numbers, such as wood under 15% and drywall under 10%. Trade writers push back: fixed figures like 16% or 20% are often a misrepresentation of the standard. Materials and meters vary, and a reading only means something against a reference from your own home. If a contractor gives you one number for everything, ask where it came from. propertycasualty360
7. Document the job
Keep the moisture map, daily readings, equipment log, and photos. This drying documentation supports an insurance claim and settles disputes.
How to find hidden moisture after water damage
Water follows gravity and gaps, so it ends up where you can't see it:
Wall cavity moisture: behind drywall, baseboards, and cabinets
Wet insulation: inside exterior walls and attics
Subfloor moisture: under tile, laminate, and hardwood
Wet flooring layers: pad and underlayment beneath carpet that feels dry
Framing: the bottom plate of walls and lower studs
Common warning signs are a musty smell, bubbling paint, soft or stained drywall, cupping floors, and indoor humidity that stays high even with the AC running.
Professionals use two tools, and they do different jobs. A thermal imaging camera shows surface temperature differences. It does not see water itself. A cool patch can be missing insulation or an air leak, and reflective surfaces can fool the camera. The camera tells the tech where to look, and a meter confirms.
Meters come as pin or pinless. A common workflow is to scan with a pinless meter to map the edge of the wet area, then confirm the worst spot with pins. Both have blind spots. A pinless meter averages what lies within roughly three-quarters of an inch, so a wet stud behind drywall can look fine on the surface. And metal corner bead, foil-faced insulation, or mineral-heavy concrete can push a meter to its maximum when no water is present.
The output is a moisture map: readings plotted on a sketch of your home. It defines the wet zone and gives later visits something to compare against.
What equipment is used for structural drying
Equipment | What it does |
|---|---|
Moisture meters (pin and pinless) | Measure moisture content in drywall, wood, and framing |
Thermal imaging cameras | Flag likely wet areas for meters to confirm |
Air movers | Increase air circulation across wet surfaces to speed evaporation |
LGR dehumidifiers | Remove vapor from the air, even in humid conditions |
Thermo-hygrometers | Track temperature and relative humidity, and let techs calculate GPP |
Water extraction equipment | Pumps and extractors that remove standing and absorbed water |
Dry in place or tear out? It depends on the material
This is where contractors differ, and it affects your bill.
Drywall. One restoration company's guidance says directly affected porous materials such as drywall, ceiling tiles, and insulation should be removed during the emergency visit. Other firms dry drywall in place when it's clean-water, recent, and intact. Both approaches exist. In my assessment, removal makes sense when the water was contaminated, the material stayed wet for days, or it can't be reliably cleaned. Drying in place makes sense when clean water hit intact material and daily readings can prove the assembly is drying.
Insulation. Common trade practice is to remove it from wet wall cavities, since it holds water and dries slowly.
Hardwood flooring. Dense boards and urethane finish slow things down. Some drying guidance gives about 3 to 5 days of controlled drying, while another restoration brand says it may take three weeks or longer. The spread is real. It depends on how much water got underneath, which is why one reading on top of a board isn't enough.
Subfloor and framing. One company warns that studs and subfloor left wet for more than 24 hours can lose structural integrity. Treat that as one firm's warning, not a code rule, but it explains why these hidden layers get checked first.
Cabinets and baseboards. Water gets trapped behind them, so techs commonly remove baseboards or open the space behind cabinets to let air move. Ask what will be opened before they start.
HVAC. If water reached ducts or a return, ask the tech to inspect them before the system runs, since contaminated water can spread through the ductwork.
Removing materials vs drying in place: pros and cons
This comparison is my assessment, built from the sources above plus common trade practice. Your contractor's readings should decide each case.
Removing wet materials
Pros:
Exposes studs and cavities directly, so air reaches the wet layers
Removes materials that can't be reliably cleaned after Category 2 or 3 water
Leaves less uncertainty about what's behind the wall
Cons:
Raises the repair bill, since removed drywall, insulation, and trim must be replaced
Adds dust, noise, and rebuild time
Can remove material that would have dried fine
Drying in place
Pros:
Keeps more of the original finish, so the rebuild is smaller
Creates less mess and disruption
Works well for clean water, caught early, in intact materials
Cons:
Depends entirely on readings that prove the cavity is dry
Carries a higher risk of missing hidden moisture
Is a poor fit for contaminated water or long-soaked materials
How long does structural drying take after water damage?
The sources disagree, so here's the spread.
Many restoration companies quote about 3 to 5 days for typical jobs, and 4 to 7 days for larger events.
A trade-magazine editor writes that a three or four day dry-out is possible but extremely rare once category and class are considered.
For drywall specifically, one company says usually 4 to 7 days when properly ventilated and dehumidified, while another says small sections can take 2 to 3 days.
My read, and it's an opinion: 3 to 5 days is fair for a small, clean, recent loss with carpet and drywall. Multi-room losses, slabs, hardwood, hidden moisture, and contaminated water can take substantially longer. A reliable timeline comes from the initial readings and daily monitoring, not a fixed promise on the phone.
What stretches the timeline: how long the water sat, how much there was, the affected materials, the water category, hidden pockets behind cabinets or under tile, a leak above that soaked a ceiling, and outdoor humidity, which rarely helps in Cape Coral.
Is running a fan enough?
Rarely. A fan moves air without removing moisture from it. In a humid house it can push damp air into dry rooms while the wall cavity stays wet.
DIY drying is realistic in two cases: a small spill on a hard surface caught within hours, and a clean-water leak that only reached the top of a carpet. Even then, check the pad and subfloor, since carpet can feel dry while those layers hold water.
Structural drying vs air drying
Structural drying | Air drying | |
|---|---|---|
Method | Air movers, dehumidifiers, controlled space | Open windows, fans, time |
Finish line | A measured drying goal | "Feels dry" |
Hidden moisture | Found with meters and thermal imaging | Usually missed |
Fit in humid climates | Works because it controls the air | Struggles when outside air is damp |
Records | Moisture map and daily log | None |
Air drying has a place: a small, clean spill on a hard surface. Past that, it's guesswork.
Professional drying vs DIY: pros and cons
The right approach depends on the size of the loss, water category, affected materials, contamination risk, and whether hidden moisture is present. Points tied to a source are cited, and the rest are my assessment.
Professional structural drying
Pros
Gives you a measured finish line. The S500 calls for setting a moisture goal and adjusting equipment if readings don't confirm drying.Finds hidden moisture by pairing a thermal camera with meters, instead of trusting touch.
Handles Class 4 materials like hardwood, plaster, and concrete, which may need special methods and longer drying times.
Produces a moisture map and daily log that support an insurance claim.
Is the safer route when the water might be contaminated.
Cons
Costs more than fans and a rented dehumidifier. I couldn't verify a current Cape Coral price range, so ask for a written estimate after the first readings.
Disrupts the house. Expect equipment noise and a drafty property for a few days.
Varies in quality, because the standard behind it is voluntary, not mandatory.
May involve tear-out, which adds to the repair bill.
DIY drying
Pros
Costs the least for a small, clean spill caught fast.
Starts immediately, and timing matters.
Fits narrow jobs. EPA guidance for wet carpet describes removing water with a wet vacuum, pulling the carpet and pad off the floor, and drying them with a fan.
Cons
Can't confirm "dry." A homeowner meter carries the same blind spots pros deal with, such as averaging what lies within roughly three-quarters of an inch.
Risks spreading contamination, since fans shouldn't run before the water is confirmed clean.
Struggles in Cape Coral's humidity, where fans alone can move damp air around.
Leaves you without drying records, which can weaken an insurance claim.
Misses wet layers under carpet, tile, or hardwood.
My rule of thumb (opinion): DIY a small, clean, surface-level spill you caught within hours. Get a professional assessment when water reached walls, flooring layers, or more than one room, or when the source may be contaminated.
Secondary water damage: what skipped or rushed drying causes
Secondary damage is everything that happens because moisture stayed behind. One drying company says drywall, wood framing, and subfloor can hold enough water to fuel mold growth for weeks if they aren't professionally dried, and wet framing and subfloor can swell, warp, and lose structural integrity. That's a contractor's view, so treat the weeks-long timeline as a worst case. The pattern holds: wet materials that stay wet grow mold, swell, and warp.
Typical results include mold in wall cavities, cupped or buckled hardwood, a spongy subfloor, and a musty smell that returns every humid week.
Mold prevention after water damage
Fast drying is the main control. These steps help:
Dry within 24 to 48 hours where you can
Remove unsalvageable porous materials rather than hoping they dry
Don't run fans until the water is confirmed clean
Confirm readings meet the drying goal before walls close
Fix the source, and keep indoor humidity under control after the equipment leaves
Antimicrobial treatment is common practice on cleaned surfaces, especially after Category 2 or 3 water. It doesn't dry anything, so it can't replace drying.
If mold does show up, Florida draws a legal line. State law defines mold remediation as work on mold or mold-contaminated matter greater than 10 square feet, and that work requires a licensed mold remediator. Residential owners are exempt on their own property. The EPA doesn't regulate mold or airborne spores, so licensing is a state matter. A company that dries well may not hold a mold license, so ask which service you're buying.
Common mistakes
Judging by touch. Drywall can feel dry while the stud behind it is wet.
Pulling equipment on a set day. The goal is a reading, not a date.
Closing walls too early. Once drywall goes back up, no one can check the cavity.
Waiting on the insurer. Check your policy for a duty to limit further damage, and start protecting the home while the claim opens.
Accepting "it's dry" without a reference. Without a dry standard from your own home, dry is a guess.
After drying: before anyone closes the walls
Confirm the readings. Every monitored point should meet its drying goal, with the log to prove it.
Find the cause. A meter shows where water is, not where it came from, so confirm the source is fixed before rebuilding.
Get the permit question answered (see below).
Keep the paperwork. Rebuild scopes and insurance claims both lean on the drying records.
Insurance deadlines and permits in Cape Coral
Insurance deadlines. Under Florida law, a claim is barred unless the insurer receives notice within 1 year of the date of loss, and a supplemental claim within 18 months. Open the claim early and share the drying logs. This is general information, not legal advice, and flood policies have their own rules, so confirm with your insurer.
Permits and the 50% rule. The city requires a permit for repairs in the Special Flood Hazard Area, including a Substantial Improvement/Substantial Damage application. Substantial damage means restoring the structure to its pre-damage condition would cost at least 50% of its market value. After Hurricane Ian, a local official said south Cape Coral saw 1 to 2 feet of water and potentially hundreds of homes may have sustained substantial damage. The cost counts even if you do the work yourself: the city manager said the rule looks at labor and materials whether or not they were free. Moisture maps, photos, and itemized scopes make the review easier. I couldn't confirm from the sources I checked whether emergency drying and demolition alone trigger paperwork, so call the city's permitting office before you rebuild.
Choosing a water damage drying company in Cape Coral
If you're searching for a structural drying company near you, or comparing water damage restoration companies, these questions separate the careful ones from the rest:
What category and class did you assign, and why?
Will you take readings from unaffected materials to set my drying goal?
Will I get a moisture map and a daily log to keep?
What would you remove, what would you keep, and why?
Which Florida license covers any mold work?
How soon can you start? The first 48 hours matter.
What drives the price. I couldn't find a reliable, current Cape Coral price range, so I won't quote one. Cost generally follows the area affected, the water category, how many equipment days the class requires, and how much demolition the job needs. Ask for a written estimate after the first readings, and ask what would change it.
Red flags: a firm timeline before any readings, one "dry" number for every material, and no return visits.
Questions people ask
How does structural drying work after water damage?
Techs extract standing water, locate wet materials with meters and thermal imaging, then run air movers and dehumidifiers in a closed space while checking readings daily against a drying goal.
How long does it take to dry drywall after water damage?
Sources range from about 2 to 3 days for small sections to 4 to 7 days with proper ventilation and dehumidification. Long-soaked or contaminated drywall is often replaced instead.
How long does the water damage drying process take in Florida's humid climate?
Typically 3 to 5 days for simple jobs and longer for large or contaminated losses. Local humidity can slow it, so expect your tech to adjust equipment as readings come in.
Does insurance cover structural drying?
It depends on your policy and the cause. Ask your insurer in writing, and keep invoices and drying logs.
Can I stay home during drying?
Often yes for small, clean jobs, but not with Category 3 water. Expect equipment noise and a drafty property for a few days.
How do I know my walls are dry?
Ask for readings against a drying goal set from your own unaffected materials, not a single number.
Need structural drying after water damage?
If water has reached drywall, flooring, insulation, cabinets, or other building materials, a professional assessment can identify hidden moisture and set a documented drying plan. Rapid Restoration Group provides water damage restoration services in Cape Coral and surrounding Southwest Florida communities.
For significant, contaminated, or multi-room water damage, have the affected areas assessed promptly rather than relying on surface appearance or a household fan.
[Call-to-action button and phone number]