Water doesn’t always announce itself with a puddle. After a leak, storm, or plumbing failure, moisture can travel through wall cavities, soak insulation, and sit behind drywall long after the surface looks dry. In places like Cape Coral, where humidity stays high most of the year, that hidden water becomes a fast track to mold, soft drywall, and bigger repair bills.
Moisture mapping is how restoration professionals stop guessing. They systematically measure and document moisture levels across walls, floors, and ceilings, creating a clear picture of where water has gone even the parts you can’t see. This process guides targeted drying, limits unnecessary demolition, and gives insurers solid documentation.
Here’s how it works, what signs to watch for at home, and why the tools matter.
Why Hidden Water Behind Walls Is So Common
Water follows gravity, capillary action, and the path of least resistance. A slow supply-line leak in a bathroom wall can wick sideways along framing or drop into lower levels. Roof water can run along joists before showing a ceiling stain. In Cape Coral homes, AC condensate lines, slab leaks, and storm-driven rain through windows or foundation seams add extra risk.
Visible damage is usually just the endpoint. The real saturation often sits inside the cavity. Left alone, materials stay wet long enough for mold to start growing sometimes within 24 to 48 hours under the right conditions. That’s why surface drying alone rarely solves the problem.
Signs of Water Damage Behind Walls You Can Spot Yourself
You don’t need equipment to notice early clues. Watch for these:
Bubbling, peeling, or blistering paint
Soft or spongy drywall when you press gently
Yellow, brown, or irregular stains that reappear after painting
Warped, swollen, or separating baseboards
A persistent musty or earthy smell concentrated near one wall or room
Higher-than-normal humidity or condensation on nearby surfaces
Unexplained increases in your water bill or the sound of running water when fixtures are off
In Cape Coral’s climate, these signs can appear faster after storms or during long stretches of high humidity. A faint stain or soft spot near a bathroom, laundry wall, or exterior corner deserves attention even if the rest of the wall looks fine.
These are clues, not confirmation. Only measurement shows the full extent.
How Professionals Perform Moisture Mapping
Moisture mapping turns scattered readings into a usable plan. Technicians follow a structured process rather than checking random spots.
They start with a walk-through to identify the water source, category (clean, gray, or black water), and likely migration paths. Safety checks for electrical hazards come first.
Next they establish dry standards. Readings from unaffected materials of the same type in the same building become the baseline. “Normal” moisture content varies by material, climate, and construction, so local comparison matters more than a universal number.
Then the systematic scan begins. Using a combination of tools, they move in a grid or perimeter pattern often every few feet along walls, at floor junctions, mid-wall, near ceilings, behind cabinets, and in adjacent rooms or levels. Readings get plotted on a floor plan or digital schematic. Wet zones, damp transition areas, and confirmed dry zones appear clearly.
Daily rechecks during drying show progress. The map updates until materials reach the established dry standard, usually confirmed with consecutive readings.
This documentation supports the drying plan, insurance claims, and verification that the job is actually finished.
The Tools That Locate Hidden Moisture
No single tool does everything. Professionals combine them because each has strengths and limits.
Non-invasive (pinless) moisture meters scan large areas quickly without making holes. They use electromagnetic signals to detect elevated moisture near the surface of drywall, wood, or other materials. Great for finding the boundaries of a wet zone.
Pin-type moisture meters drive two probes into the material to measure electrical resistance, which correlates with moisture content. These give more precise readings at specific depths and help confirm what the pinless meter flagged. Small holes are the trade-off.
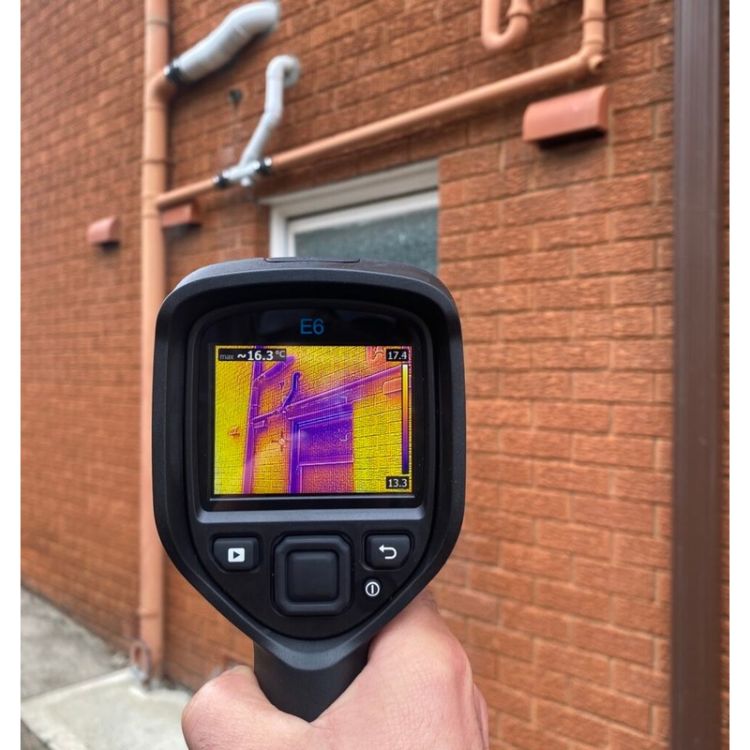
Thermal imaging (infrared) cameras detect surface temperature differences. Wet materials often appear cooler because of evaporative cooling. A cool pattern on an otherwise normal-looking wall can point to moisture inside the cavity. Thermal imaging does not measure water directly it shows temperature anomalies. Drafts, missing insulation, or thermal bridging can create similar patterns, so every thermal finding needs meter confirmation.
Thermo-hygrometers measure air temperature and relative humidity. These readings help calculate whether the drying environment has enough evaporative capacity and track conditions inside cavities when probes are used.
In some cases, a borescope (small camera) through a tiny access hole lets technicians see inside a cavity without major demolition.
Used together, these tools reduce both missed moisture and unnecessary wall removal.
What Happens After the Moisture Map
The map drives decisions. Areas that can be dried in place get focused air movement and dehumidification. Heavily saturated drywall, insulation, or other materials that won’t dry reasonably get removed. The source of the water is fixed first otherwise moisture returns.
Daily monitoring continues until readings match the dry standard. Only then does reconstruction begin. This approach limits secondary damage and helps control costs.
Cape Coral-Specific Considerations
Southwest Florida’s combination of high humidity, frequent storms, slab construction, and heavy AC use changes the risk profile. Moisture that would dry slowly in a drier climate can linger longer here. Slab leaks, condensate issues, and post-storm intrusion through windows or low walls are common local patterns. Professional mapping that accounts for these conditions and local building materials produces more reliable results than a generic approach.
Common Mistakes Homeowners Make
Relying only on what you can see or feel is the biggest one. Painting over a stain or running a fan on a soft wall often just hides the problem. Waiting too long after noticing a musty smell or bill spike allows mold and structural issues to advance. Attempting deep drying or opening walls without proper containment and measurement can spread contamination.
If you suspect hidden water, the practical next step is a professional inspection that includes moisture mapping. Early documentation protects both the structure and any insurance claim.
Moisture mapping is not flashy. It is careful measurement, clear documentation, and decisions based on data rather than appearance. When water has already moved behind walls, that methodical approach is what separates a complete repair from a temporary surface fix.